
Whew. It’s finally over. Months and months have gone by, and the project you’ve been working on is almost ready for launch. Normally, you’d be happy to just push the project to the back of your mind and say, “NEXT!”… Before that though, I think there are a few things we owe the client… little things that can really make a difference. to truly call a theme “done”, and before it is pushed live. Here, I’ll discuss a few clean-up and optimization tasks that I’ll take a look at before launching a site.
CSS: optimization, organization, comment-fication
If you use any of the popular “starter themes”, such as the wonderful Zen, you’ll find that after you’re done there can be a lot of cruft and empty CSS rules in your stylesheets. The first thing I try to do when I’m winding down my work in a CSS file is strip out all of the CSS selectors that aren’t doing anything. There’s usually a bunch.
I try to break my CSS into major sections (although this should be something you do from the start… keep your CSS organized), using CSS comments to label them into sensible groups to make it easier to find what you’re looking for. If I have CSS that is overriding module CSS, I will put that at the bottom of the document and label/group it as module overrides.
Next step is to run my CSS files through an online CSS optimizer (back them up first!), trying to condense the code as much as possible, while also making the code readable for future designers/developers. There are a number of sites out there that will tidy up your CSS for you, but a favorite of mine is the Icey CSS Compressor which I found via BloggingPro’s rundown of different compressors. It usually saves me about 20% in filesize.
The downside to running your CSS through a compressor is that it will frequently “mess some stuff up”. Extra padding on some elements, less margin on others… that kind of thing. It is not unusual to have to make some fixes to the CSS afterwards because when the compressor moves things around in a CSS document, it can sometimes affect which style rules are applied, and in what order. I think the trade-off of making a few fixes for an optimized CSS document is well worth it, especially if the theme is going to be running on a high traffic site. Quickly loading, lean CSS is always good practice.
Turn off any theme registry dumps
Drupal 6 uses a theme registry to cache many often-used parts of a theme so they don’t have to be reloaded constantly from page to page. Sometimes, you’ll want to throw the following into your template.php file so that the registry gets cleared on every page load, especially during development so you don’t have to clear its cache over and over again.
drupal_rebuild_theme_registry();
http://api.drupal.org/api/function/drupal_rebuild_theme_registry/6
Be sure you either comment this out or remove it entirely from your template.php before pushing your site live! If you are using Zen, or a subtheme of Zen, your admin section provides you a setting to turn this rebuild function on/and off at will and you don’t need to place drupal_rebuild_theme_registry(); in template.php. Devel module’s block allows you to empty the cache at any time, among other cool development-side stuff my themer mind hasn’t wrapped around yet. Also, the admin_menu module also gives you a quick way in the upper left of flushing all the cache. If you are doing some theming and your changes don’t seem to be taking hold, always try clearing the site’s cache first. But back to my point… if you are clearing the cache on every page load with the function above, be sure to remove it after development is done.
Favicon
 You know you’ve seen it a million times. People with Drupal sites who have never switched out the default Drupal icon for the browser’s URL bar… the favicon. There are obviously many situations you don’t want your user knowing that your site runs on Drupal via a cutesy favicon. Luckily, each theme can have its own favicon. To create one, simply open up your graphic in your favorite editor and crop it to a square. Then go to favicon.cc and create the .ico file you’ll need. Drop the favicon.ico that is generated into your theme’s directory, and your browser picks it up and uses it as the theme’s default favicon.
Thumbnail image for the theme
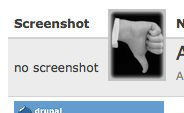 You know how when you go to the themes admin page and there’s a screenshot for each theme? You don’t want to launch and have the client see a “no screenshot” message or any theme-generic image sitting there for your theme. It’s quick and easy to put something custom here. Simply take a screenshot using the method of your choice, scale/crop it to 150×90 in the photo editing software of your choice, save it as “screenshot.png” and place it in your theme directory.
CSS/XHTML validation tests
Web standards make the world a happier place, day by day. Be sure you run major pages of your site through XHTML and CSS validation tests: http://validator.w3.org/ The goal here is to pass the tests. 🙂
After these things have been addressed, I think you’ll find that your theme feels like it’s a little more ready for the spotlight… for both the user and your client who will be dealing with things from the admin side.
What are some finishing touches that you usually go through on your sites?